
Selected Access
- In the Sage 50 User Security window, choose the New User option to add a user to the system.
- Next, in the User Rights window, choose whether the user will have Administrator rights, Full access, Selected access, or None.
- If you choose to give the user Selected access, click Next, and Sage 50 brings up the Selected Access window, where you grant individual rights to the user.
Setting up roles with access to areas of Sage 50
In Role Setup, you set up roles so that users with them can access certain areas of the Sage 50 program within the current company. Sage 50 program areas include the following:
- My Dashboard (Sage 50 Quantum Accounting)
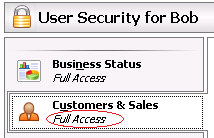
- Customers & Sales
- Vendors & Purchases
- Inventory & Services
- Employees & Payroll
- Banking & General Ledger
- Company
For each area, the drop-down list at the top right-hand side of the
window lets you grant blanket access.
The left side of the window indicates which access level you've chosen for that area.
Custom Access
In addition to full or no access, you can use the grid to set different
levels of access for subareas such as maintenance, tasks, and reports.
When you set up a role with other than full or no access rights to an area, the left side of the window will read Custom Access.
Setting access levels: Drop-downs let you set different access levels for different subareas of the program—for example, Payments/Write Checks.
User Roles: Security Access Levels
You can select the following access levels. These levels affect the areas of the Sage 50 program that users can access, as well as the extent of access available.
- No Access: The user cannot open any Sage 50 window within the program area. Menu options related to the program area or window will be disabled.
- View Only: The user can display the program area or specified Sage 50 window or view existing data but cannot enter a new record or change existing data.
- Add: The user can display the program area or specified Sage 50 window and add new records or transactions.
- Edit: The user can display the program area or specified Sage 50 window, add new records or transactions, and maintain (edit) existing data.
- Full Access: The user can display the program area or specified Sage 50 window, add new records or transactions, maintain (edit) existing data, and delete data. Full access also allows the ability to perform specified system functions.